Exporting in VMD
Screen Capture Using Snapshot
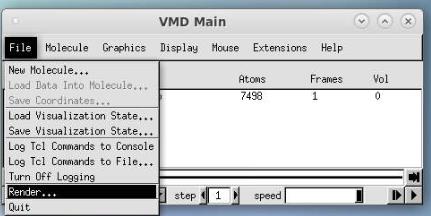
The simplest way to produce raster image files in VMD is to use the Snapshot feature. The snapshot feature captures the contents of the VMD graphics window, and saves them to a raster image file. On Unix systems, the captured image is written to a 24-bit color Truevision Targa file. On Windows systems, the captured image is written to a 24-bit color Windows Bitmap, or BMP file.
To use the snapshot feature, simply open the Render form and choose the snapshot option. VMD will capture the contents of the graphics window, and attempt to save the resulting image to the filename given in the Render form. You may find that it is important not to have other windows or cursors in front of the VMD graphics display when using snapshot, since the resulting images may include obscuring windows or cursors. This is a platform-dependent behavior, so you will need to determine if your system does this or not.

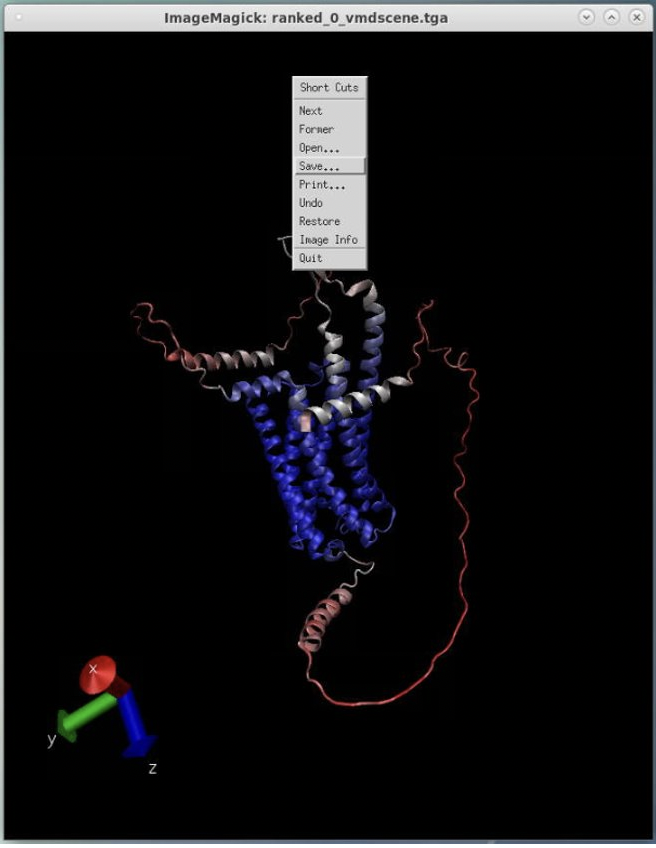
In the pop-up imagemagick window, right-click and hit save (see below).
Next, hit format, and a new popup appears.
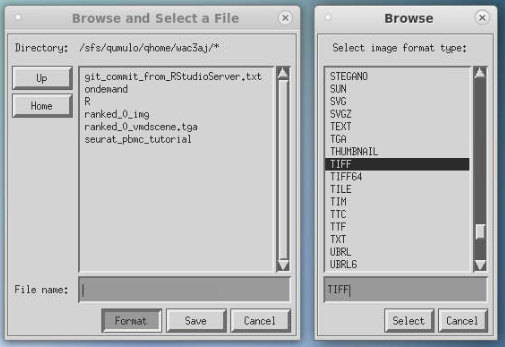
Select your image format (TIFF or PNG is recommended) and hit select.
Type the file name, including the extension, and hit save.
Now, you will have a high-quality image for use in presentations, publications, etc.